
My painting surfaces come in two flavors – canvas and Masonite. The former is generally for smaller works up to 2’ x 3’ or thereabouts, while canvas is used for larger works. This is for two reasons, First, the upper side of Masonite offers a very even surface allowing for (where I so desire) fine detail work and smooth bold planes of color. The textures of canvas by contrast, can obscure detail, and reflectivity is broken up by the subtle effect of the cloth. Beyond that, we have found that large sheets of Masonite can warp over time, and in our experience, bigger paintings are better done on canvas stretched over ¼” plywood.
In both cases (Masonite and plywood) the process starts off by deciding with sizes and proportions I desire for the work. My husband then cuts the Masonite / plywood out to the chosen sizes using both hand-held saw and a table saw.
The larger Masonite units are then cradled with ¾” x 1” strips of clear pine, that are glued to the back (rough side) of the Masonite, and the edges of the cradling trued with the margins of the board. Smaller pieces (less than ~ 12” on one axis) are left un-cradled as they are stiff enough and won’t deform over time.

For larger (say 3’ x 3’ or larger up to my big 7’ x 4’ pieces) my husband cuts a 4×8’, ¼” plywood , sheet to size and again glues 3/4” x 1 ½” pine cradling to the back surface, often with 2 or more cross braces as well as corner braces for stiffness. We then cut out a piece of canvas that is a foot or so larger than the dimensions of the supporting board and “stretch” it across the board. This involves centering the board on the canvas and then stapling alternate sides of the canvas to the cradling on the back, with an eye to the threads. This is a two-person process as one person needs to pull on the canvas to ensure its tautness as the other is stapling. We start at the center of the long axis and work to the two ends, being careful to create no folds or creases in the canvas and no unfortunate diagonal stresses. The threads should run parallel to the edges of the board. The process finishes with a meticulous folding of each corner, tucking and trimming the intersecting long and short axes of the canvass into a neat bundle & stapling it out of the way.

Whether board or canvas, the next step is to cover the surface with a time-honored substance – gesso. This is composed of paint pigment (generally white, but it can be tinted, though too much tint can compromise a painting’s longevity,) chalk and a binder (originally rabbit-hide glue, now synthetic.) This serves two purposes. First it provides a consistent surface for the paint to adhere to. Second, properly applied, it creates an extremely durable and stable skin that potentially can outlast the life of board or canvas beneath it. In fact, museum conservators count on this, and centuries-old paintings have been “restored” after the canvas or wood they were on rotted away – this by the process of floating the painting on its gesso base off the old surface and on to a new one.
So, how does one establish this gesso base? We set up a bunch of saw horses covered with sheets of ¾” ply in the car port and put the boards/stretched canvases on them. I get out a sander (in my case a half sheet oscillating pad sander with 80 grit paper) and sand the surface of the board or canvass until a good tooth is raised. I then brush off the loose material and use a roller to apply the first coat of gesso. This is allowed to dry completely, and then sanded smooth. This is repeated five times until I deem the gesso surface thick enough to carry the work, and the feel of the surface is like kidskin, smooth enough to paint. However sometimes I will deliberately use a large brush on the last layers to give myself a different kind of surface to paint upon. Fully dried and after one last sanding, the boards go into storage in the studio to await inspiration.

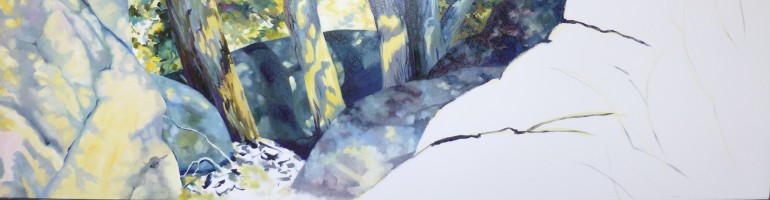
Here’s a load of boards after I’ve put paintings on them and am waiting for the gallery to come by and pick the next show.


Wow, what a lot of work, but worth it. When is the next show?? I’m hoping to visit the gallery in Santa Barbara in September.
Thank you so much, Janet. Yes, I have a new show up now– and there’s an article about my work in our Santa Barbara Independent that you might like. Roger Durling wrote it and he did nothing less than a brilliant and kind job of talking about my work and where it all comes from.